
Introduction
Tables of Authorities (TOAs) are complex, finicky things. If you’ve practiced law for any length of time, you probably know that TOAs — a structured list of citations used in legal documents, organized by categories such as cases, statutes, and regulations — have a way of showing up when you least want to deal with them.
When you’re in crunch mode and need to focus on preparing the most compelling argument for your client, when filing deadlines are staring you in the face, and phone calls and emails are streaming in — that’s also when you need to devote several hours to preparing a complicated, fiddly cover sheet where small errors can make a judge question your attention to detail.
Luckily, this is an area where software has stepped in to fill the gap. And we’re pleased to share Jurisage’s 2025 Guide to Tables of Authority, which goes into as much detail as you’ll need to master TOAs.
In this series, we’ll take a deep dive into how to use the most common piece of legal technology available today — Microsoft Word — to generate TOAs.
Here’s what you can expect:
- Tables of Authorities in Microsoft Word: An Overview (this article)
- Adjusting your Microsoft Word Table of Authorities: A Deeper Dive
- Tables of Authorities: Best Practices
- Automated Tables of Authorities: Leveraging Technology and AI for TOA Generation
Tables of Authorities in Microsoft Word: An overview
Microsoft Word and tables of authorities
There are many tools available for preparing tables of authorities, ranging from fully manual (just doing it yourself) to fully automatic (tools that will scan and prepare TOAs for you).
In the middle of the spectrum between fully manual and fully automatic is the TOA tool built into Microsoft Word. It’s not fully automatic, as you’ll see, but it’s a lot more efficient than doing the work entirely by hand. And it has a few inherent advantages:
- It’s free, which counts for a lot.
- It’s always available. You may not have access to the other tools, but the built-in TOA capabilities in Microsoft Word will always be there — so it’s worthwhile learning how they work.
- It’s the basis for other tools. The competitor tools all differentiate themselves against the Microsoft Word TOA tool — which is another reason for learning it as a “basis tool”.
Context: how Microsoft Word thinks about tables of authorities
Microsoft Word’s TOA tool has its own quirks. A lot of pain and frustration can be avoided by learning about how it works.
The underlying technology behind the Microsoft Word TOA tool are “field codes”, hidden placeholders that instruct Word to insert or update specific information automatically, like dates, page numbers, cross-references, or citations. Behind the scenes, the Microsoft Word TOA tool uses field codes to mark each citation so that Word can accurately track and compile your cited cases, statutes, or regulations into an organized list. You can actually reveal these codes by pressing Alt+F9, which is one way to edit or troubleshoot them (more on that later).
The Microsoft Word TOA tool is therefore a graphical interface that creates and updates field codes for you, rather than doing it yourself.
When you build a table of authorities, Microsoft Word searches for the marked citations, organizes them by category, references their page numbers, and displays the table of authorities in the document. For example, the field
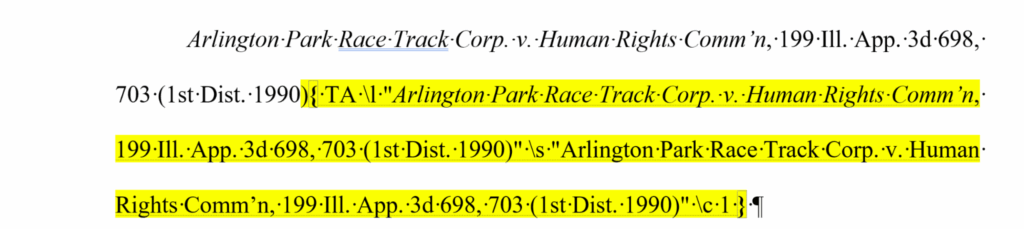
A TOA field code in Microsoft Word
creates the following entry in the “Cases” category of a table of authorities:

The resulting text in the TOA
The high level process
At a very high level, the process of creating a TOA in Microsoft Word goes like this:
- Mark all your first-note citations. Here, you mark citations and Microsoft Word inserts a special TA (Table of Authorities Entry) field in your document.
- Mark your subsequent citations. You can choose to have the Microsoft Word TOA tool automatically mark each subsequent occurrence of the citation, or you can mark each occurrence manually.
- Generate the TOA. You’ll press a separate button to actually generate the TOA, as well as make changes to its appearance.
- Repeat. If you’ve made substantive changes to your document, including adding or removing citations, you’ll need to repeat the entire process.
Now that we’ve covered the high level process, let’s look at it in more detail.
Creating Your Table of Authorities: Step-by-Step
Step 1: Marking Initial Citations
Your goal here is to identify and mark the first instance of each legal citation in your document.
Let’s mark your first citation. Select the text you’d like to appear in your TOA. Then, click on “Mark Citation” in the References tab of the Ribbon
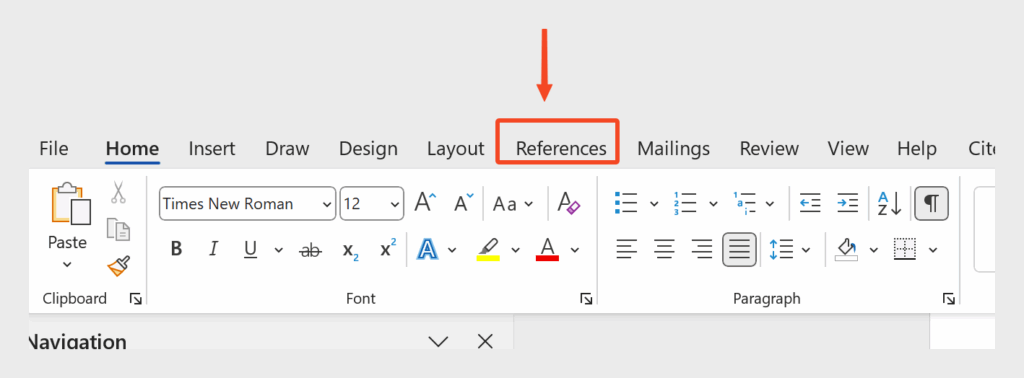
Click the “References” section of the Microsoft Word Ribbon

From the References tab of the Ribbon, click “Mark Citation”.
You’ll see a dedicated “Mark Citation” window appear:
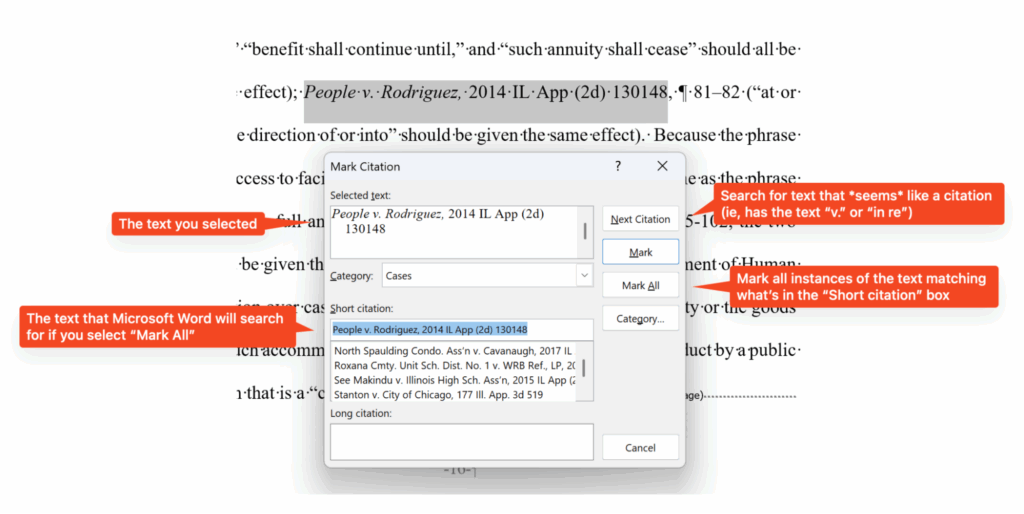
The “Mark Citation” window
There’s a lot going on in this (too-small!) window, a combination of options and functions.
Options:
- Selected text. Here, you’ll see the text that you selected in your document. Pay attention here, because this is the same text that will be reproduced in the TOA itself. If it doesn’t match what you’d expect, you can make changes directly in this section. (Note that there is another way to make corrections, which is discussed below)
- Category. Select the category (cases, legislation, etc) that this citation belongs to.
- Short citation. This section is designed to help Word identify additional uses of this citation.
Functions
- Mark. This will simply mark this text as a citation, ensuring that it will be included in the TOA
- Mark All. This will attempt to find all the instances of this citation throughout the document and mark them as well. This is risky because it will miss items if you haven’t consistently used the same short citation, and it won’t pick up id/idem/ibid references.
- Next Citation. Microsoft Word will attempt to locate the next closest citation in your document. It’s not a particularly smart approach: it simply looks for text like “v.” and “in re”, and is also likely to miss important items.
This is the process to follow when identifying the first instance of a citation. But what about subsequent references to a citation? Read on…
Step 2: Mark subsequent citations
Under many court style guides, when you first cite a citation, you’re required to provide all the publication details; subsequently, you might refer to the citation via a short form, or even id, idem, ibid, or supra.
A TOA needs to include references to all citations, including short forms. Microsoft Word has a special process for marking subsequent citations, allowing you to attach them to their “parent” citation:
- Identify the subsequent citation. You’ll need to use your own editorial eye to identify subsequent citations.
- Mark the subsequent citation. Select the text that you’d like to mark, and click “Mark Citation” on the Ribbon.
- Connect the citation to its “parent”. Scroll down in the (very) small panel just below where it says “Short citation” and find the parent citation. Select it, then click “Mark”
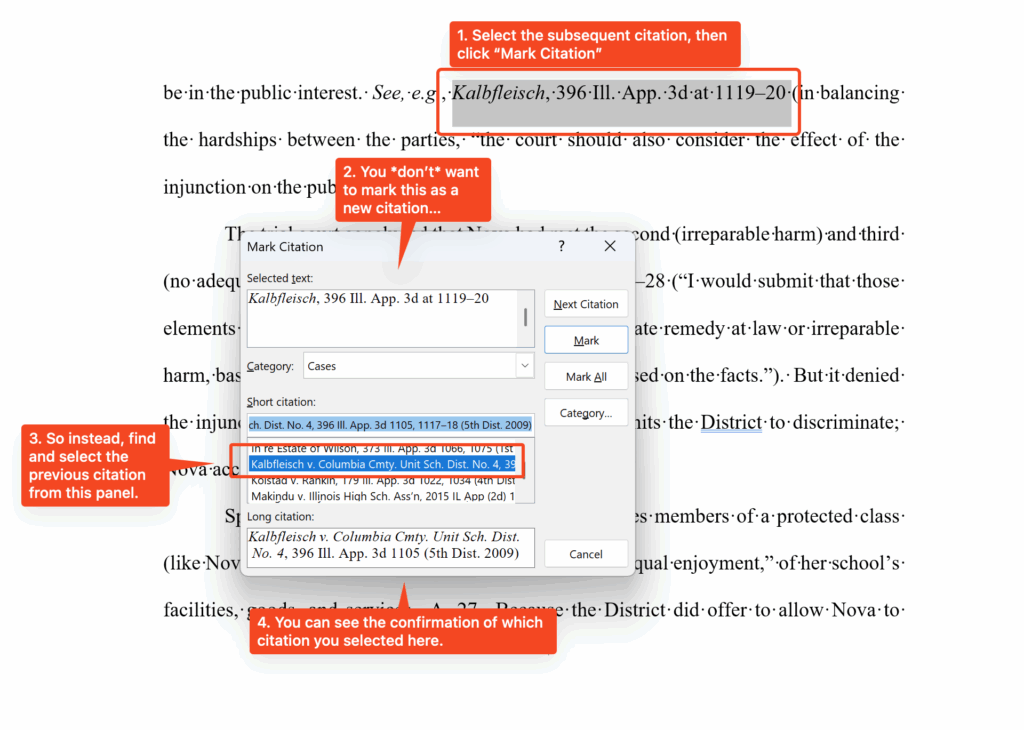
Marking a subsequent citation
The result of this process is that Microsoft Word will indicate all the pages where the citation occurred.

An entry in a TOA showing multiple locations in a document
Step 3: Generating the TOA
Generating the TOA itself is relatively straightforward.
- Place your cursor where you want the TOA to be included.
- Click Insert Table of Authorities on the Ribbon.
- From the Table of Authorities window that appears, click OK.

Click here to insert your TOA
We’ll go into much more detail on formatting TOAs, but for now, keep an eye out for the following options:
- Use passim. If any of your cases are cited more than 5 times in your document, Microsoft Word will insert the word “passim” for the subsequent citations in order to save room.
- Keep original formatting. This ensures that if elements like case names are italicized in your document, they’ll remain italicized in the TOA.
- Tab leader. This is the set of characters that separates the end of each citation from its page numbers.
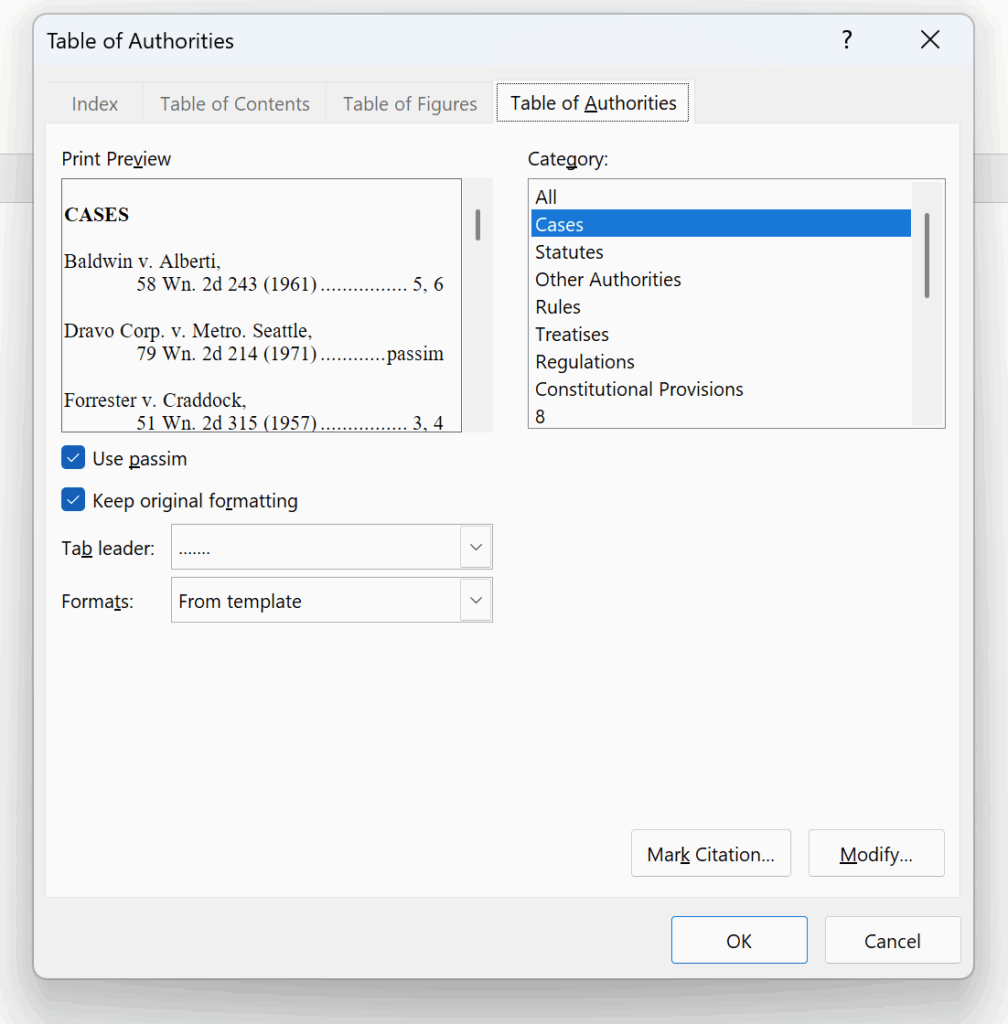
The Insert Table of Authorities window
If you’ve followed all these steps, you’ll be rewarded with … a table of authorities!

The final result: A TOA
Conclusion and Additional Resources
Our next instalment of this series will go into a deeper dive on adjusting your TOA, including making changes to the appearance of citations, adjusting field codes, and adjusting formatting
In the meantime, you might be interested in Jurisage’s own automated TOA Builder. Microsoft Word’s built-in TOA tool gives you a strong foundation, but Jurisage’s TOA Builder is fully automated, web-based, simple to use, and available without a subscription! Give it a try and let us know what you think.